
Guest Experience: the welcome page for your guests
Updated
On this page
The Guest Experience is a site’s welcome page: a welcome with a photo, the Wi‑Fi box and tiles with everything guests need during their stay, such as check-in and check-out, house rules, restaurants and day trips. Guests open it with a QR code, even on mobile data, or see it as soon as they join the site’s Wi‑Fi. It is included in every plan and each site has its own.
Where to set it up
In Sites, open the site and, in the Guest Experience box, press Set up the Guest Experience. On the right, the Preview shows the page as guests see it, even before you switch it on.
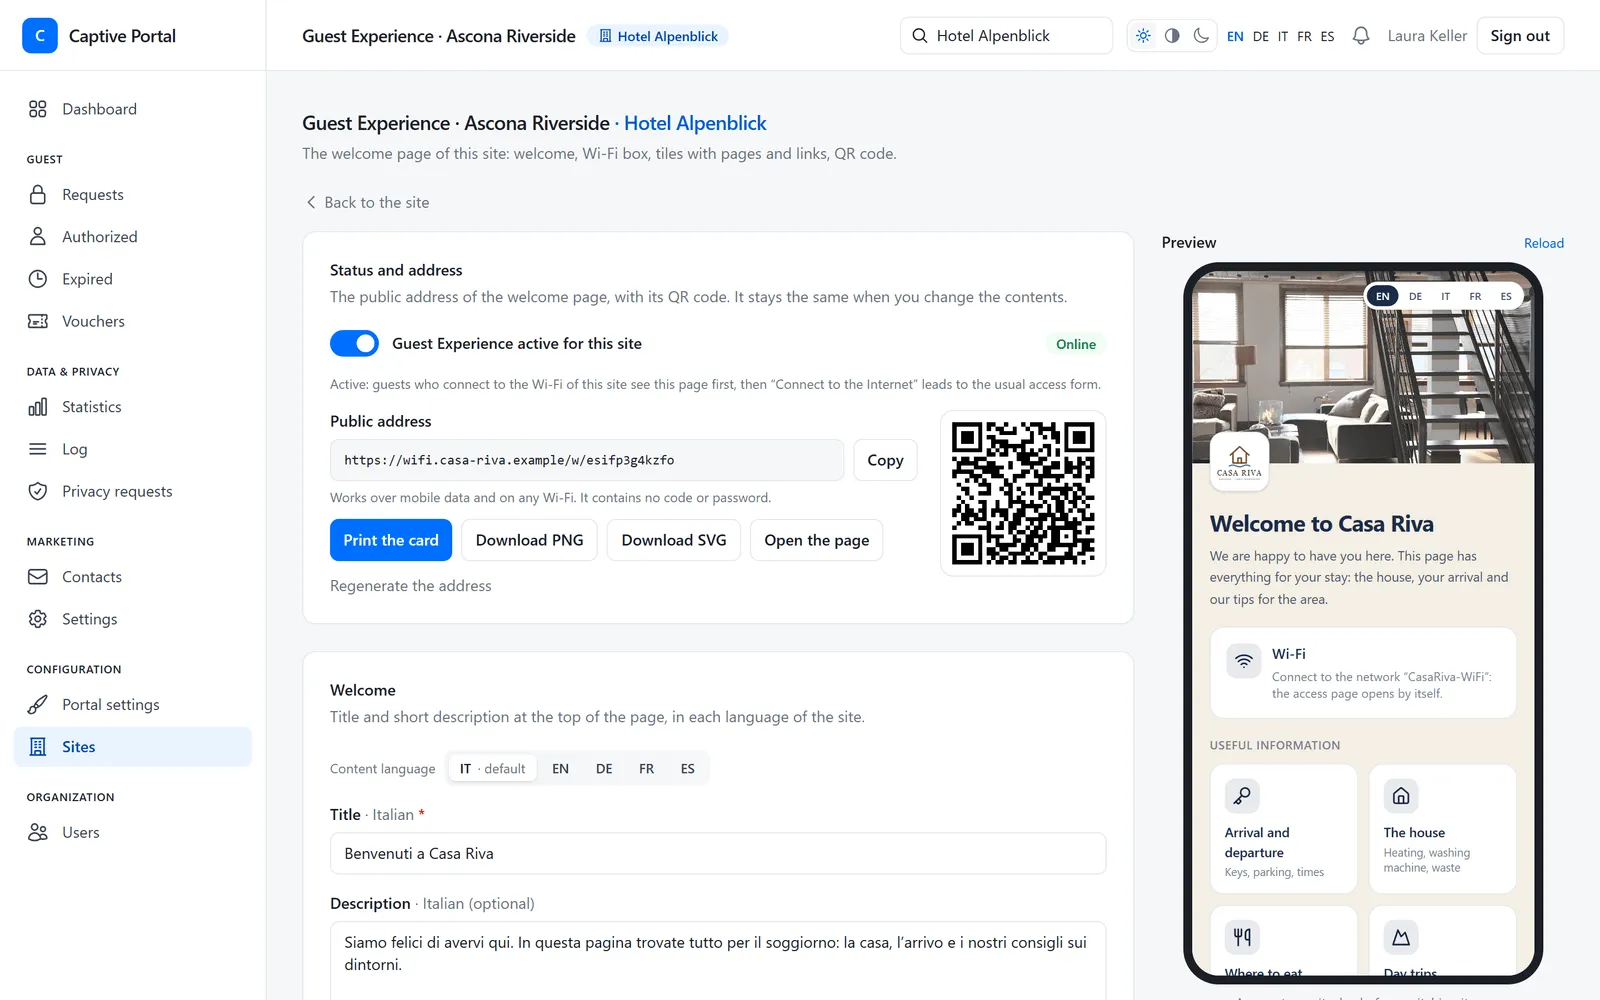
The Guest Experience of a site
1. Welcome
In the Welcome box, pick the language you are writing in under Content language, then fill in:
Title: required in the default language, for example “Welcome to Casa Riva”;
Description: a few welcome lines, optional;
Wi-Fi network name: the guest network name, shown to people who open the page from the QR code;
Show the logo: the site or portal logo above the title.
Press Save welcome. The first save creates the page’s public address and its QR code.
2. Main image
In Main image, press Upload image: JPG, PNG or WebP up to 5 MB. We scale the photo down and remove its hidden data, including the GPS location.
3. Tiles and pages
Tiles are the boxes below the Wi‑Fi one. With Add a tile, choose the Type of tile:
Internal page: a page with an introduction and a list of items, such as restaurants, rules or useful numbers;
External link: opens a website with an address starting with https://.
Each tile has an Icon, a title and a short description. In an internal page, on the Page content tab, add the Items of the page: each item has a title, a description and, if needed, Website, Map link and Phone. The phone number starts a call with one tap.
Drag tiles to change their order. With Visible you hide a tile or an item without deleting it. Changes to tiles are saved straight away.
4. Languages
The page is shown in the site’s languages, and guests can switch at the top. Write the texts for each language by picking it under Content language: they are not translated automatically. If a text is missing, guests see it in English or in the default language.
5. Switching it on
In Status and address, switch on Guest Experience active for this site: the status turns Online. From then on:
the public address and the QR code respond;
guests who join the site’s Wi‑Fi see the welcome page first; Connect to the Internet takes them to the usual sign-in form, with e-mail, voucher or access code.
When it is off, the page does not respond: you can prepare it and print the card in advance.
6. QR code and card
In Status and address you find the Public address and the QR code:
Print the card: an A5 or A6 card with the QR code, to leave in the house;
Download PNG and Download SVG: the QR code for your own design or your welcome message;
Open the page: the page as guests see it.
The address does not change when you edit the content, so printed cards keep working. The QR code contains no codes or passwords.
Frequently asked questions
Do guests have to sign in to see the page?
No. The page can be read straight away, even before going online. Signing in is only needed to browse, with the site’s access mode.
Can I use it without the site’s Wi‑Fi?
Yes: the QR code works on mobile data and on any Wi‑Fi. To show the page when guests join the Wi‑Fi, the captive portal must be active on the site’s UniFi network.
I have several holiday homes.
Each home is a site, with its own page, QR code and card, all managed from the same panel.